Sunday, April 19, 2015

Burgundy Medieval Gown

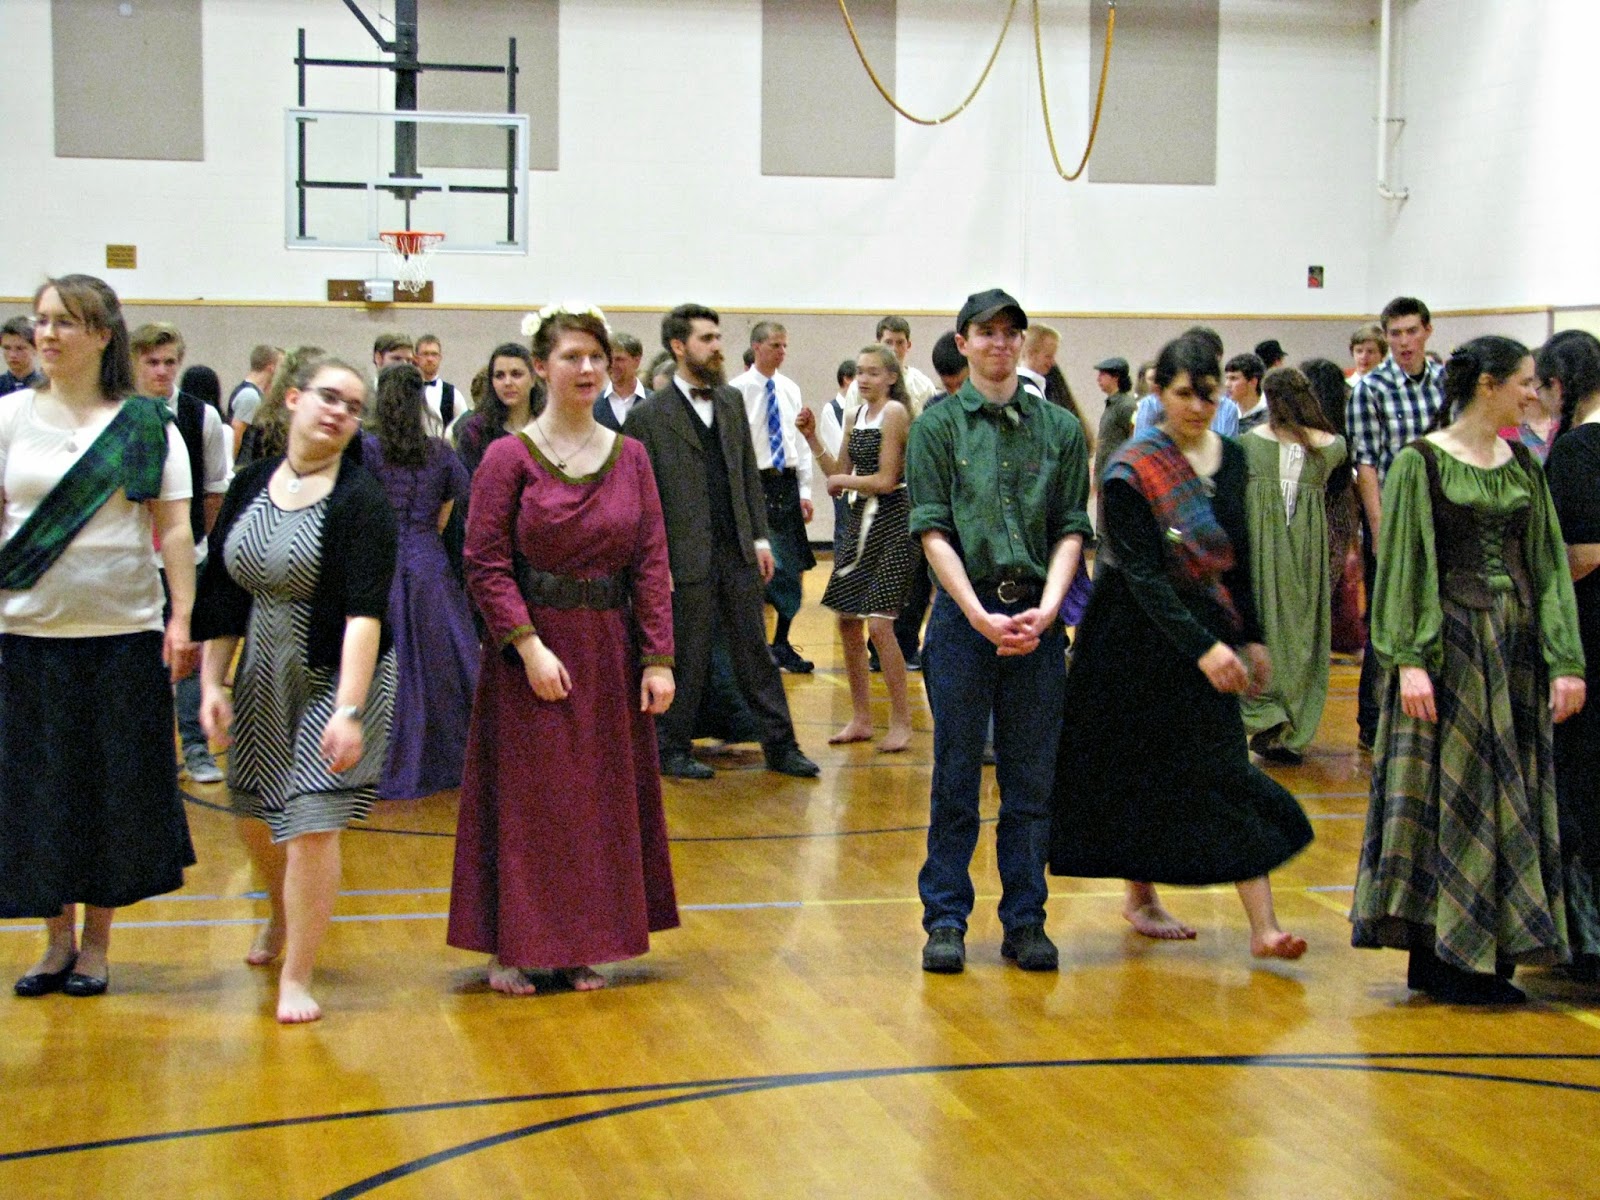
On top of fixing up my own costume for the Celtic ball, my sister, Jessica, needed a dress that fit the theme. She came up with the general look that she wanted, and I had to bring it down to realistic expectations since I had classes, homework, work, and ball decorations to do too. ;) 

We found some burgundy sheets in my mock-up material bin, and I started cutting things out. Thankfully, I had done that pattern a couple times before, and it went together very quickly. Which was good because I finished it the night before the ball.
The next thing to add to her costume would be an embroidered belt. With floral swirls. Yeah, that sounds cool. 

After I finished sewing it, I stepped back and realized that we had essentially created Mother Gothel's dress from Tangled. Completely unintentional, but still pretty awesome. 

Until next time!
SG


Scottish Country Girl

I'm still here!!!
After finishing the MotB dress back in January, I needed some super easy projects (pillowcases anyone?), and then I sent my machine off to get a servicing. After goodness knows how many hours have gone onto that thing, it needed some R&R, or just a tune-up, ya know. Then I got it back and started chipping away at the sewing to-do list that grew while the machine was away. First up was making alterations and additions to my costume for the Celtic ball (which was on Saturday). 

Ever since the theme for the ball was announced late last year, I've been planning this get-up. I already had the dark blue skirt/'petticoat', blouse, and yellow over vest thing, but I wanted to add more Scottish flair to the mix. I found a plaid that I absolutely adored (from Joann's, oddly enough), and whipped it up into a floor length skirt. Then I made the shawl. Do you know how long it takes to pull all those threads to make the fringe? Anyways... Those two plaid pieces done, I put the ensemble on Lady Catherine, the dress form, and stepped back. It was quite the mishmash of things. To clean up the look, I made a stomacher using a piece from one of JP Ryan's patterns  and stitched it into place. Much better! The day of the ball, I was able to get into it quite quickly (which was good because I got a late start to getting ready) and topped everything off with a woodsy crown that I found at a Renaissance faire last year. The finished look was exactly what I was aiming for: a Scottish country girl with fashion influences from the 1700's. With flower crown. :P A friend of mine said that it was like a Celtic fairy or sprite and that I needed a special power. Invisibility. That's my super power. But that's a story for another day. ;)
I could probably have dedicated a bit more time trying to work with the tucked in part of the skirt. Oh well! It worked. 

The shawl is tucked into a :really: cool belt loop that was given to me (by a complete stranger, no less!) and held in place at the waist by grosgrain ribbon. 

Until next time!
SG

Friday, January 30, 2015

Mother of the Bride Silk Dress

Every once in a while you get a real stumper of a project. Despite all your planning and research, you still can't make the darn thing work. Much gnashing of teeth, pulling of hair, and spilled blood (YES!) and tears, but nothing will cooperate with you. Thus is the tale of this dress. 
A bride-to-be reached out to me asking if I could make her mom a dress for the upcoming nuptials since all their shopping attempts were for naught. We got the conversation rolling, details ironed out, and the patterns, fabric, and trim was acquired. Little did I realize what I was getting signed up for when the bolt of fabric was handed to me. The gorgeous lightweight silk would prove to me more challenging than I initially thought.  

I first made a mock-up our of old sheets to figure out the quirks of the dress and jacket patterns. They turned out decently enough, except the jacket gave me some grief. More on that later. 

I felt comfortable enough with the dress to cut that one out first. Pretty straight forward, the dress came together quite nicely. Except for my poor finger. I sewed through the tip while installing the zipper (and this was shortly after I had commented on not knowing how people sew through their fingers. What are they doing? Focusing on the fabric obviously). Don't worry about the dress - not a drop touched it. ;) I want to say though - this was the best zipper that I've ever installed. First time putting in an invisible zipper, but using the right foot on the machine made a world of difference. 
Sewed up the seams, hemmed, and stitched on the sequin trim, and it was done! The jacket shouldn't be too bad if the dress came together that easily, right? Uh, no. 
Issues with the jacket? It's a Vogue pattern. On the bias. Out of lightweight silk. 
Cutting was a slow, tedious process with many, many, many pins. That fabric was slipperier than a politician. Despite my best attempts, the fabric did what it did best - stretch. 

You see, fabric has the warp and the weft (the directions of the weaves in the material) and they aren't necessarily that stretchy. The dress is a prime example of that. It's cut out lined up with the weave so you don't get stretch-age. Then there's the bias which is the stretchiest part of the fabric. When you cut on the bias, your project gets this gorgeous, flattering drape. Some fabrics have more give than others, and delicate silks are apparently stretchier than Gumby or Stretch Armstrong.   
After getting through cutting, I carefully went through everything step by step with things stretching every which way. I finished assembling the jacket and put it on my dress form, Lady Catherine. After letting it stretch even more overnight, I came to it the next morning and saw how much one side stretched. Are you kidding me? I trimmed it to line up with the other side and moved on. 

Then came the interfacing. Unfortunately, I didn't have the right interfacing weight in my stash, so off to the fabric store I went. I can't visit that store without spending $30 at least. I try to minimize how often I go for that very reason. ;) Waiting for my cutting counter number to be called, I blissfully shopped through the store, then chatted with the folks at the counter (who know me and my crazy sewing antics), and meandered towards the checkout counter. I wasn't in a hurry to get home, but I also wasn't aware of what was in store for the rest of my afternoon and evening. 

With the interfacing and then some in the front seat next to me, I toodled on home. La-di-da-ed through cutting out and ironing the interfacing to the pieces, and hummed along while the sewing machine did its job. I top stitched the pieces in and put it on the dress form. 

Oh. 
my. 
gosh.

It was hideous. 
Ugly.
NOOOO!!!!!

Even the lightest of interfacing was still too heavy for the silk. The sides stuck out like a Mad Hatter coat. This was bad. Very, very bad. I tried trimming it, but then it stuck out in the most unflattering of ways. It had to all come out. The next few hours were tearfully spent with the seam ripper. I have a love/hate relationship with that thing. 

The rest of the evening was spent trying to figure out how to hem the thing. Narrow hem seemed to outweigh all the other options. I pinned everything then went to bed. 

Next day, it was hemmed, and the sequin trim stitching began. I turned on some happy music (2Cellos!) to get me through. After the last stitch went in, I put it on the dress form to see what damage had been done this time. Not horrible, necessarily, but definitely NOT what the desired outcome was. Some fiddling and ironing later, it was as good as it was going to get. The deadline had come. 

At the mock-up fitting, everything fit perfectly (which was surprising), so I anticipated things at the final fitting to at least fit. Which it did. But it didn't look at all what everyone was hoping it would. The jacket was given a big 'no-go.' The dress fit well though! But essentially back to square one in terms of the jacket/dress combo. 

Why was this jacket giving me so much grief? Because of how the pattern was designed: it's meant for heavier fabrics as noted on the pattern. I should have looked. I've never had that problem before, but then again, I wasn't working with airy silks.  
I am my own worst critic when it comes to anything. So I feel like I'm to blame for the mess that the dress situation became since I didn't notice the suggested fabric list. Lesson learned. Check. Never forgetting that one. Unfortunately, since I was working on the dress, I put off quite a bit of homework, and now I don't have time to make another jacket. :/ I've left the mother-of-the-bride in a lurch just over a week before the wedding. :sigh: 

I'm off to make some cotton pillowcases, eat chocolate, and watch me some Pride and Prejudice. Maybe some gardening too. This weather has been way to nice to not be outside. 
Oh, wait. I have homework. 

Until next time,
SG

Thursday, January 8, 2015

Princess Anna in Disneyland

I just :had: to show you pictures of the little princess in Disneyland. ;) 
She ran and ran and ran, and didn't trip on the dress. 

Despite being a cotton, it wore well! (you should have seen me at the fabric store crumpling all of the cottons) There was minimal wrinkle-age. 


I could just pinch those cheeks!

And she got to see Anna and Elsa twice! 


Until next time!
SG

Friday, December 19, 2014

Toddler Princess Anna

It's ~*done*~
And of-so-painfully adorable! 
Even though she's still young, I think she understand that this is a special dress. From the moment that we put it on for a fitting, she couldn't stop smiling. Then she went on to explore the stairs and clocks because those were a just as awesome, but we'll ignore that. :P 
'Thank you, Mommy!'
I was so worried that it would be too big. All I can say is, 'Thank goodness for sashes.' ;) Little missy has some room to grow into her pretty princess dress, but it also fits her now so that she can meet Elsa and Anna at Disneyland in her first cosplay. 
I think I'm dying from cuteness overload. 

Until next time!
SG

PS - Once I get 'in action' pictures, I'll post those. Because, seriously, her meeting with Anna and Elsa is going to be absolutely charming. ^_^ 

Tuesday, December 16, 2014

Toddler Anna Dress WIP

I have another dress from Frozen to show you! 

A friend of mine has a little girl, and she's looking for an 'age appropriate' dress for little miss to wear while they're at Disney Land. Of course, Disney has really figured out how to design ADORABLE kiddos, and they're clothes are equally cute. Anna is one of the top cute kids in Disney movies. 

The inspiration for the dress is Anna's toddler dress from the song, 'Do You Want to Build a Snowman?' You can get a better view of the dress in the pictures in the book A Sister More Like Me illustrated by Brittney Lee (very sweet story and pictures!) Brittney was one of the illustrators for Frozen, and her artwork served as a launch point for the look and feel of the movie. 

I did some research for making the dress itself, but couldn't find much. If you google 'toddler princess anna,' you get a boatload of toddlers in either the coronation dress or the winter dress. :sigh: Of course I made a Pinterest board to reference while putting the dress together. ;) 
Source
I found a pattern that would be relatively easy to alter (I used the same technique for the neckline alterations here as in Elsa's dress), scalloped the skirt, cut out a dozen tulips, and went to town with applique. I must say, I've never done this much applique before. Let's call it a 'learning experience.' Double-sided fusible interfacing is your friend when it comes to applique. I don't want to know how things would have turned out if I didn't have it.
  For the scallops, I did a similar thing as with the neckline - I cut out the contrast 'underskirt' band and zigzagged the 'overskirt' onto it. I wasn't about to try to hem scallops again. 
All that needs doing now is to attach the skirt to the bodice and put in some buttons!  

Until next time!
SG

Sunday, December 14, 2014

Elsa Dress

This is ridiculously loooong overdue. It was finished in time for Halloween. :P My job, school, homework, and Christmas trees have sucked up all my blogging time, but now that the term is in the bag (!!!), I have a smidgen more time to sit down and write something that isn't for a class.

The first project that I want to show you is Elsa's 'Let it Go' dress from Frozen (but you knew that already). I used Simplicty pattern 3725 as the base and altered it using Andrea Schewe's tutorial series as my guideline.  
You can see more Elsa inspiration and my thought process for the dress on my Pinterest board
I made the dress to be a bit bigger with a tie in the back so that it can be worn for a longer time. 

The fabrics are just from Joann's. Since I hate how reflective fabrics look when photographed, I used the wrong side of the satin as the right side. You still get that gorgeous teal, but not the nasty glaring reflection from the camera's flash. (/rant)
This dress was filled with everything from 'oops' to 'dang it!' I had never really worked with a sheer until I did this dress. One of the moments when I wanted to cry while working with it was when my machine ate it into the bobbin well, chewed it up a bit, and then sewed it onto itself in the wackiest places. (That was the only moment that I wanted to cry. Yeah, there were frustrating moments, but that almost did me in). The only noticeable 'drats' is on the back where the the zipper stops: the trim didn't line up... :( I added a little bling to help, but it didn't really help all that much. 'It's just a dress-up costume; it's fine' they said. So I left it. 
Picture used with permission
The dress was a hit. She wore it for a week, slept in it, and went trick-or-treating with all the other Elsa's that were haunting neighborhoods this year. :P 

Until next time!
SG