Thursday, December 22, 2016

Christmas Skirts

...Or the same fabric three ways. 
I was haunting the thrift store, when I came across hangers and hangers of plaid fabric. It looked like someone had cleared out their fabric stash and donated it. Honestly, I could have bought it all, but I restrained myself and showed self-control and only purchased one length. 
I had 6 yards of 60" fabric for only $11.99 and it has a gorgeous feel and drape. 
See what I mean when I say that I showed some serious self-control in not buying ALL of the fabric?

There was enough material that I could make 3 skirts - one for each of my sisters and myself. But we didn't want to have a matchy-matchy, we're-related-and-the-fabric-was-on-sale look if we should happen to all wear our skirts at the same time.  So we each decided on a different skirt pattern. 

The taller sister wanted a pencil skirt. No problem! I have a pattern for that! Except... the pattern wasn't in her size. Drats. So we found a different pattern. It was a wrap skirt that screamed 90's. Nope. Not going to happen. So we landed on a simple A-line made from a giant rectangle gathered at the waist with elastic. No pattern needed, sewing it up was easy (so was lining up the plaid). 

The skirt for my other sister is a circle skirt. From the get-go she wanted a circle, but I wasn't sure if I would have enough fabric. So her skirt was made last. :P Just to make sure. Her skirt was also made without a pattern. You simply fold the fabric into quarters (much like the first steps of any origami creation) and the magic radius' measured and marked. Put in a zipper, add a waist band, and voila! Another skirt done. 

Look at that gorgeously lined up plaid! :swoons:
 My skirt was also rather simple - just a reproduction pattern from the 70's. A-line, no gathers or pleats, and a button up front. 
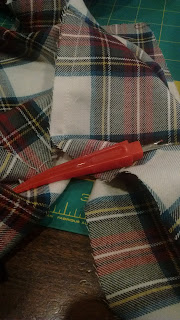
 And the only seam I had to rip in this entire adventure was in this skirt. :fist pump: 

The goal was to have them all finished for the Christmas dinner at church. That almost happened. I just had a hem to finish, but then it was bitterly cold and we each decided on a warmer outfit for the evening. 

I'll have to see if I can convince certain sisters of mine that we need to get a group picture with the three of us in our skirts. We'll see if that actually happens though. :P 

Until next time! 
SG

Sunday, November 13, 2016

Some Tiny Sewing

The last few weeks, in the spare moments that I can find or if I'm procrastinating on homework, I've been chipping away at the scrap stash to add to the doll dress collection. That way I have them ready to go for the next bazaar, and I won't be scrambling to pull my act together the week beforehand. ;) 

I've lovingly dubbed this one the 'back-to-school' dress for obvious reasons. 
As I was rummaging around in one of the many scrap bins, I found just enough of the apple print to make a dress with. My only qualm with it was how much it screamed '90's'... But I decided to give it a go anyway. No harm in using the material if I already have it, right? I finished the dress, threw together an apron, tacked on some ric-rac and declared it done. I was surprised at how cute it turned out once it was all put together. I was rather doubtful about the whole thing while I was sewing. 

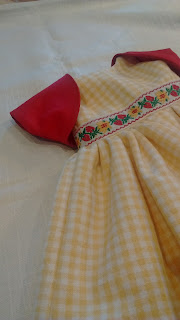
This next one, I've decided to call 'Winnie the Pooh'. Because it's yellow and red like Pooh Bear. Then my sister said that those colors reminded her of McDonald's. I like my name for it more. :P 
The trim is actually a vintage ribbon that was given to me from a fellow crafter. Her store was relocating and she needed to clear out some product. I was picking up my doll dresses before she moved the store, and she gave me a couple of lengths of ribbon so long as I promised to use them on doll dresses. I most certainly can do that. 

This next one is one that I want in my size. Pretty please? 
Eyelet makes for easy hemming. ;) 

The other day, I was cleaning up the craft/sewing room, but as I was working, I found a piece of pillowcase that had been given to me from my great-aunt. I believe that it was embroidered by my great-grandma, but the rest of the pillowcase had been terribly worn out over the years. I have the matching pillowcase on my bed, but this cuff had been relegated to a forgotten corner of the notions box. 
And all of a sudden, I knew exactly what I wanted to make with it. So I sat down and whipped out a doll dress when I should have been cleaning. 
The pink braid is also a vintage trim that was given to me. I can't recall who it was from though... 
Can I have this in my size, too, please? 

Until next time!
SG

Sunday, October 16, 2016

Some Rainy Day Sewing

 With the recent storms that blew through the area, there was obviously no desire to be working  outdoors. We battened down everything before things got particularly nasty, which left time to finish homework and some sewing. :shocker: So armed with a big cup of tea and time on my hands, I started digging in the fabric stash looking for inspiration.

I found some cheery yellow striped fabric with blue flowers on it in the scrap bins, and knew exactly what it should become. Whipped out the dress, put it on the tiny dress form, and stepped back. Yeah, the dress was done, but let's make it an entire outfit! I've got time! So a few things were added to the ensemble. Too bad I haven't mastered doll millinery because that would be the perfect final touch. I apologize in advance for the lousy phone pictures.
IT'S SO CUTE!!! I want one in my size please! 
It looks like something that could be worn to a summer tea party in the garden. 
 The extras for the dress are an apron, fichu, and bum roll. You'll see how much the bum roll helps to hold out the tiny dress later.
 The main dress is in two pieces, each with velcro closures in the back.
Details of the bodice
See how flat and floof-less the skirt is? The bum roll is one way to fix that. Just depends on the silhouette that you're trying to create for your doll. ;) 
 Until next time!
SG

Saturday, September 10, 2016

Almost There!

Eeep! Tomorrow is the day for the Kinton Country Antique Faire!
This afternoon, my mom and I loaded up the 12-passenger van (that thing is quite handy when it comes to hauling anything and everything and everyone), and headed down the hill to set things up for the bazaar. 
This morning, I was still painting display pieces, cutting business cards, and creating a banner for the table, and assembling the clothes rack. Thank goodness for family because I probably would have been a wreck if I had to do it all by myself.  
Yesterday, my brother whipped together the display pieces for the pillowcases. We repurposed the sides of the old crib that we (still) had in the attic, and he designed the base pieces to prop up the crib. They're rather ingenious if I do say so myself. I owe my brother a plate of cookies. He's requested snickerdoodles.
The other night, I had created some templates for my di-cut machine, but the machine needed to be realigned. I didn't have time to dedicate to that, so this morning I pulled out some brown paper that I use for pattern templates and sketched out the design. Went over it all with a fat sharpie, and that was done.  
Once I finished setting up, I took a deep breath and looked around at what others were working on. I love how everyone's booth has a different personality, and everyone has put some much time and effort into creating their miniature shops. 
Are you able to make it? There will be great food, live music, amazing vendors, and me of course. ;) 

You can find more information here
Until next time!
SG

Sunday, September 4, 2016

Upcoming Bazaar

Hello all! While my summer has been an absolutely crazy one, I still managed to squeeze some sewing into the mix, but it hasn't been what I was expecting to work on. This coming Sunday (the 11th), I'll be attending my first craft bazaar as a vendor! In spare moments, My sister and I have been working on all sorts of goodies for the booth, and here's a sneak peak for you of the pre-bazaar chaos! ;)


You can find more information here. Hope to see you there!

Until next time!
Sarah G.

Thursday, June 30, 2016

A Long Awaited Post - Spring Sewing and the Tudor Rose

Hello all! Was my last post really in January? Well, I guess it's probably because I really haven't had much sewing time since then between work and school and adrenal fatigue. Except for one rather ambitious project. 

I've been placed in charge of decorating the English country dance balls that the group has several times a year. Each ball has a different theme that I get to play with and have some fun with. The theme for April's ball was Shakespeare since the event landed on the 400th anniversary of the bard's death. . The Elizabethan era is also when we have the first evidence of English country dance! The theme for the spring ball was really a no-brainer when we noticed the correlation. 

But how do you decorate a gymnasium for a theme like Shakespeare??? I searched online sources (namely Pinterest), but everything I was coming up with was rather... tacky. Then, my sister and I decided to try going with a more cultural route, so we searched for Elizabethan banquets and feasts and found a treasure trove of ideas (but most were far outside our budgetary constraints since we couldn't magically transform the gymnasium to a 1600's English banquet hall or transport everyone to England). You can peruse our inspiration board here. One of the common themes I saw throughout all the searching was banners. Then I found beautiful images of the Tudor rose. The train of thought then began to wonder how that would tie into Shakespeare since the War of the Roses was about 200 years before Shakespeare's time. Phooey. But wait! The War of the Roses was the setting for Shakespeare's Henry VI and Richard III. YESSSS! I get to make my war of the roses banners!!! 

But first...

Warning: the materials and techniques used in this project are not historically accurate

Now we may continue. 

For the main part of the banners, I used a blue (upholstery) velvet (that doesn't fray on the edges!) that I found in the Joann's clearance section. I then grabbed some double-sided fusible interfacing because applique is a beast without it. 
I then raided my scrap stash for the fabrics for the roses and was ready to get sewing. 

I re-sized the roses from this image, cut out the appliques, ironed them to the background, set my machine to some serious zigzagging, turned on a very loooong playlist because this was going to take a while, and got to sewing. 
And I kept sewing.  
And sewing some more.

I finished sewing on the roses, laid them out on the floor, and stood back. I needed something more. The Tudor rose needed to stand out more from the Lancaster and York roses, something to distinguish it from it's predecessors. After a quick look at Tudor rose images, I decided a crown would be the perfect thing (the whole point of the war was to decide who would rule anyway). So a crown it would be. But that meant I had to cut out and sew on another detailed, curvy applique. Oh well. I found another playlist and got back to work, and I'm really glad that I did because I'm very pleased with how they turned out. 
They made the perfect backdrop! ^_^ 

Looking at the pictures now, I realize that the roses are upside down. Oh well, I sure ain't going to rip those suckers out! They are sewn down well enough to survive the apocalypse.

Until next time! (which will hopefully be sooner than 5 months)
SG

Sunday, January 17, 2016

2016 Project Plans

Looking at my schedule for the year, I'm going to keep my sewing project list toned down. I'm trying to finish my certificate at school, and I have a new job at a chef's garden that will fill up all the mornings that I'm not in classes leaving afternoons and weekends for homework. If I should fulfill my project goals, I'll be pleasantly surprised. If I go above and beyond that, I'll be really surprised. 

First on my docket is a new Regency day dress. This project wasn't in the cards until I went to a fun fabric store for my birthday, and I found this amazing cotton. I couldn't say no. I carried it through the store, petting it all the way. Fabric creeper, I know. But I don't know a seamstress that doesn't pet every single bolt in the store while perusing the aisles. 
Ahem. Back on topic.  
So I had this fabric. I didn't know what I could do with it. Until... Actually, I knew exactly what that fabric needed to become the moment I laid eyes on it. It needed to become a Regency dress because I totally need another one. So, it shall be a crossover dress.

I just got the buttons because I thought that they looked cool. I doubt that they'll actually work their way into the dress though. 
In case you can't see the print very well in the first picture, I got one closer up. IT'S ACORNS! 
The next project I have in the works is a working, middle class colonial dress with a caraco jacket and a red petticoat. The print was found at an antique mall (but really it's a modern Waverly), but the price was right. You might recognize the fabric because I did a post on it a while back. I've just been waiting to find the right fabric for the petticoat. The other day at the thrift store, I found a cotton sheet set that was the perfect color and it was also half off! SCORE! Now to actually make it. ;) I need to make some of the structural under pieces as well to make the look complete.  

Somewhere in there, I would like to make a pineapple reticule, regency stays, and an 1840's dress, but we shall see what actually happens. 

Until next time! 
SG